Managing in-person courses and classes
Top-level admins can create new in-person courses and classes, roll them out to specific locations, and mark team members as having attended the course, which creates a "completed" training record for the team member.
Creating and editing in-person courses
In-person courses can be reached through the courses list at Manage -> Courses
Creating a course
- Go to Manage -> Courses
- In the top righthand corner, click Add new course → Add new in-person course.
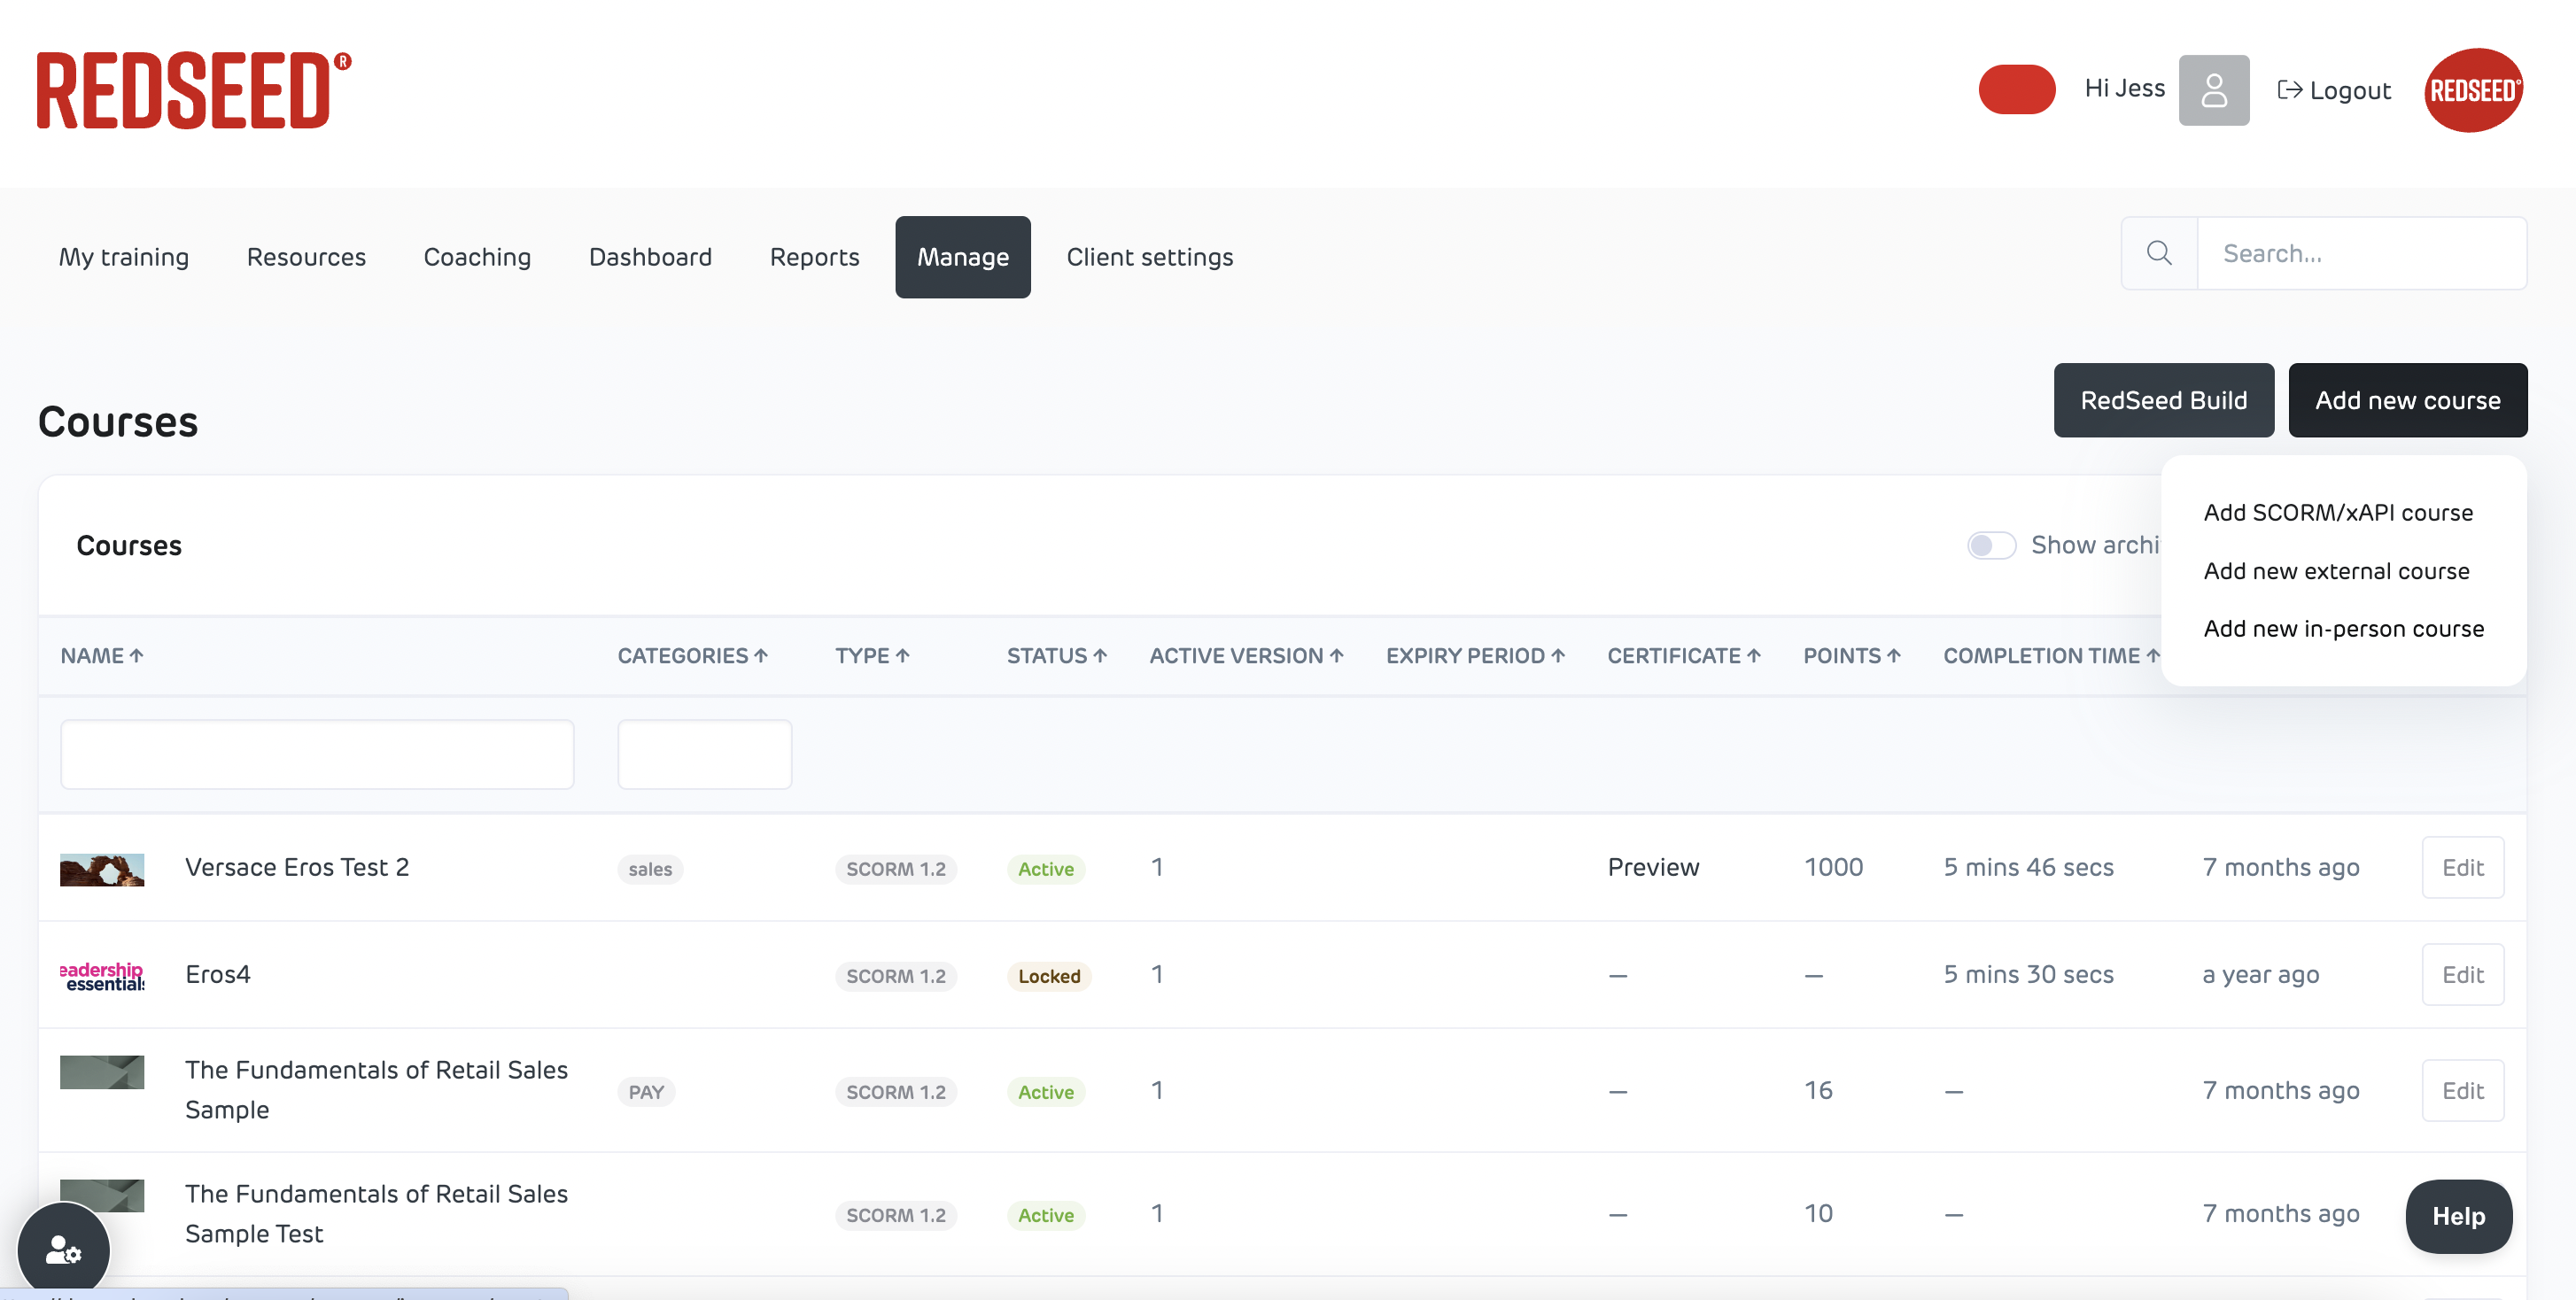
Complete the form:
- Name and Description – details of the course.
- Status:
- Draft: Visible to admins only
- Active: Available for enrollment
- Archived: No longer active
- Locations – deselect if not all apply.
- Image – optional.
- Expiry – sets how long the course stays valid (e.g. 12 months).
- Save → you’ll be taken to the Add Class screen.

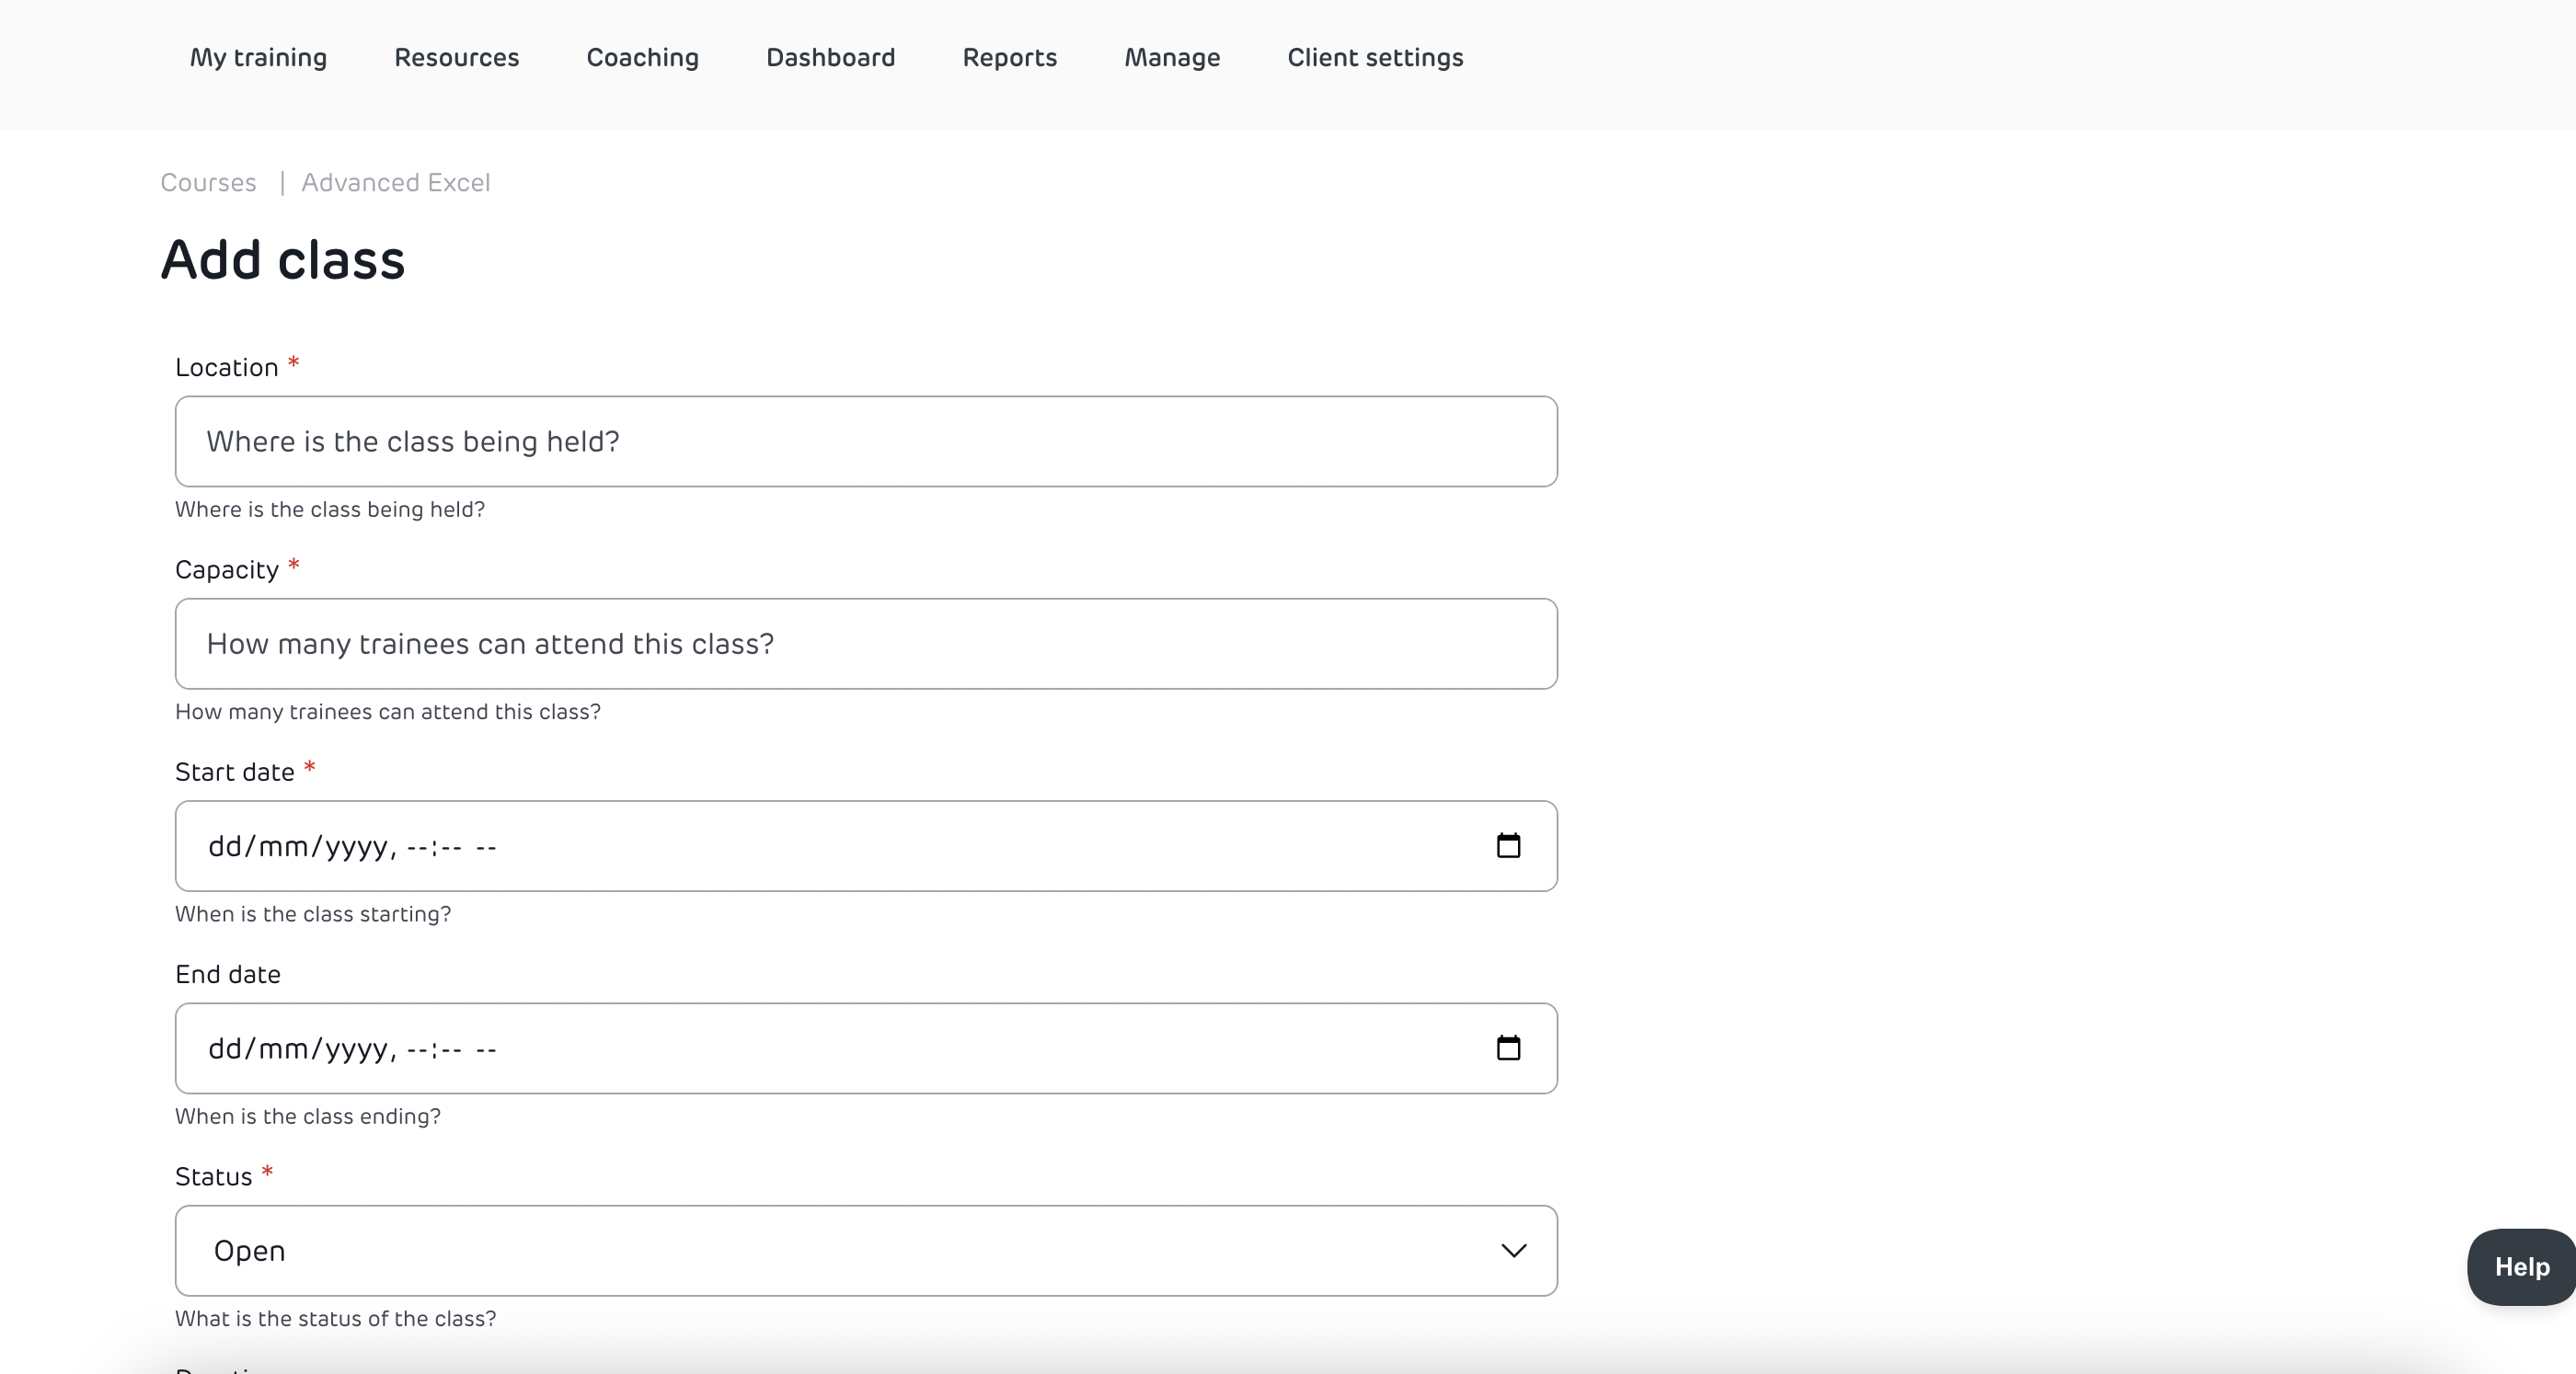
Adding a class to a course
Once the course is created, select Add Class to add a class for team members to attend.
-
Location – where the class will be held
Capacity – maximum number of attendees
Start Date – required
End Date – optional
Class Status
- Open: Available for enrollment
- Draft: Admins only
- Locked: No further attendees can be added
- Duration – how long the class runs
- Description – short summary of the class
Select Add class to save.
You can add multiple classes to the same course (e.g. different locations or dates).

Managing class attendees
For information on managing attendees in a class, please see Managing attendees for in-person courses.
Marking attendees as completed
- After the class, open the course → go to the class.
- Edit attendee → set Status = Completed Training.
- Completions appear in:
- The attendee’s Completed Training tab.
- The Training Detail Report (duration is pulled from class setup).
